A roof is your home or building’s first line of defense against the elements. It is essential for preserving your structure’s integrity, reducing energy costs, and protecting inhabitants from rain and snow.
Roofing is an exciting and challenging form of construction. There are many practical types of roofs – 64 to be exact. Contact Erie Roofing now!
Roofs have been a crucial part of human shelter for thousands of years. Without one, people are exposed to harsh weather and vermin, not to mention the stifling heat of the sun or cold night. As a result, humans have sought to protect themselves from the elements by building shelters using whatever materials were available at the time.
Brick, mud, leaves, straw, sticks, grass, reeds and animal skins have all been used as roofing material at some point in history. Early roofs were rudimentary structures that simply covered the occupants’ living spaces. However, these crude coverings were not very insulating and often prone to leaks. It was not until the middle of the 19th Century that a new type of roofing was invented.
This revolutionary material was called thatch and it consisted of tightly bundled reeds or other plant material. It was an efficient and attractive roofing solution, but it had a major drawback: thatch was highly flammable. In addition, the reeds would not last very long and needed to be replaced frequently.
In the 1700s, wood became a popular roofing option as well as an attractive one. In fact, some of the oldest buildings still standing today are constructed with wood roofs.
In the 1800s, people started treating wood shingles to produce different colors for aesthetic purposes. They also added pine pitch and linseed oil to their coating to protect them from the sun, rain and other natural elements that can cause premature deterioration.
Thatching
Thatching is a type of roofing that uses dry material such as straw, water reed, sedge (Cladium mariscus), rushes, or heather to cover a roof. This ages beautifully, provides protection from the elements, and adds to a home’s aesthetics. It is also a natural insulator, as air pockets within the thatch help to keep buildings cool in summer and warm in winter.
In addition, thatch can improve the resilience of a lawn to heavy traffic by helping to retain soil moisture and nutrients. Thatch accumulates in a lawn when the production of organic matter by the turf exceeds the capacity of soil microorganisms to break it down. Factors that can increase thatch build-up include poor soil aeration, compacted soil, cold soil temperatures, improper lawn watering practices, chemical pesticides and fertilizers, and acidic soil conditions.
There are various types of thatching; the most common in the UK is Standard thatching, using long straw or combed wheat reed. Thatching can be done on walls as well as roofs, and it is used in equatorial countries where palm leaves are prevalent, such as the ancient Hawaiian hale shelters that were built from ti leaves (Cordyline fruticosa) or lauhala leaves (Pandanus tectorius). Thatching has a maintenance cycle of 12-15 years, after which the ridge will need to be replaced or repaired, and the whole roof should be rethatched. Thatchers aim to delay this event as long as possible by completing each course of thatching correctly and maintaining the correct ridge height. This ensures that the thatch will last for as long as possible and prevents the thatching from becoming a fire hazard.
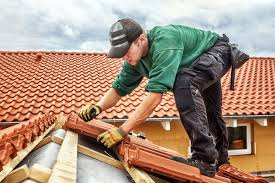
Clay Tiles
With a distinctive aesthetic and proven resilience, clay tiles have become a popular roofing option for California homeowners. Compared to concrete and slate roofs, clay tiles offer a unique blend of environmental and aesthetic benefits including fire-resistance, longevity and cost. In addition, their non-combustible characteristics help to reduce fire risk and comply with state regulations – a critical feature in wildfire-prone California.
Along with their traditional beauty, clay tile roofs are durable and highly resistant to the elements – including high winds, hail and UV radiation. They also don’t rot, are insect-proof and have low water absorption. In addition, their insulating properties allow air to circulate underneath the tiles helping regulate indoor temperatures. These features can also help lower energy bills and conserve resources.
Often, clay tiles are glazed to create vibrant colors or used in a mosaic pattern. They can also be used to mimic the appearance of other roofing materials, such as slate or wood. For a more rustic look, unglazed clay tile is a great choice and provides a more natural earthy color blend.
Due to their weight, clay tiles must be installed over a strong roof structure. This can be a challenge in earthquake-prone areas where the additional weight may pose safety risks during seismic activity. If this is the case, a professional roofer will need to strengthen the existing roof structure before installing clay tiles.
With proper care and maintenance, clay roof tiles can last for over 100 years. As such, they are an excellent choice for older homes and for those who wish to restore historic buildings or maintain their historical character. However, as the tiles age, it’s important to have a qualified roofing professional inspect them on a regular basis for any signs of wear and tear including mildew, mold or algae growth and broken or loose tile. If these are spotted early, they can be corrected by a professional before damage or moisture causes additional problems.
Flat Roofs
Flat roofs are becoming increasingly popular in residential homes. They are especially suited to the Australian climate and offer the added benefit of extra useable rooftop space. This can be transformed into a relaxing entertaining area, outdoor living space or green garden.
Due to their low pitch, the material used for a flat roof must be able to cope with water build up and the potential resulting leakage. This is why flat roofs are best suited to membrane systems, rather than traditional shingles. Wilson Brothers Roofing use the most modern TPO (thermoplastic polyolefin) roofing products, which are highly reflective and keep your home or business cooler by bouncing UV rays away.
Regardless of the material you choose, it is essential that you schedule regular inspections and repairs to prevent problems with your flat roof. For example, if your flat roof has drainage channels, it is important to keep them clear of debris like gravel, leaves and rubbish. This will prevent clogged drains and the subsequent ponding of water that could cause structural damage to your roof.
It is also a good idea to inspect the roof after extreme weather events and make any necessary repairs immediately. Small cracks, water stains or discoloured areas should be repaired straightaway to stop the problem spreading and reduce the chances of further damage.
Agable Roofs
Gable roofs are a popular choice for many homeowners because they are aesthetically pleasing and offer a number of benefits. For one, they provide generous attic space for homeowners who want to use it as a home office or an alternative bedroom. Additionally, a gable roof can help with ventilation and water runoff. In addition, gable roofs can be used with various roofing materials, including asphalt shingles, concrete tiles, and metal.
A gable is a type of roof that has two planes with sloped sides that meet at the top to form a ridge. It’s a common choice in cold or temperate climates, and it’s built using rafters, roof trusses, and purlins. These roofs can be found on a variety of building styles, from cottage-style homes to Colonial or Tudor houses.
Like other pitched roof types, a gable’s design can be easily modified to fit different architectural styles. For example, a front gable can be changed into a side gable or a cross gable. The roofs can also be constructed with either an open or a closed section, which affects the structure’s appearance.
While gable roofs offer a number of advantages, they can be problematic in some cases. For instance, if they’re constructed over an upper floor, their narrow pitch angle can create bowling alley-esque upper floors and may hinder headspace. To resolve this issue, homeowners might be compelled to add dormers to increase headspace and allow light into the attic.
Another disadvantage of gable roofs is that they can be susceptible to wind damage. However, this can be addressed by proper bracing and adequate water runoff management. Gable roofs are a good choice for most regions, but they’re not recommended in areas that experience high winds or heavy snowfall.